While your ESSE stove will give decades of dependable service, after a few years intensive use, the exterior may begin to look a little tired. There is, however, a solution. Follow these step-by-step directions to restore your ESSE’s ironwork to showroom condition!
Use only approved heat-resistant paints designed specifically for stoves or stove pipes with operating temperatures of up to 700ºC.
Good ventilation is critical for applying these paints safely, but please bear in mind that many heat-resistant aerosol paints will not perform effectively below 10ºC.
Please follow all the safety instructions on the spray can and always make sure there is sufficient ventilation in the working area. We recommend the use of protective goggles or safety glasses.
Directions
- Make sure the surface of the stove is clean, dry and free of grease. Wipe clean with a weak solution of soapy water, then dry and remove any loose paint or rust with a wire brush or light sanding. The surface to be painted must be smooth and any dust must be removed. Putting in the extra effort at this stage maximises the chances of achieving an even, durable finish.
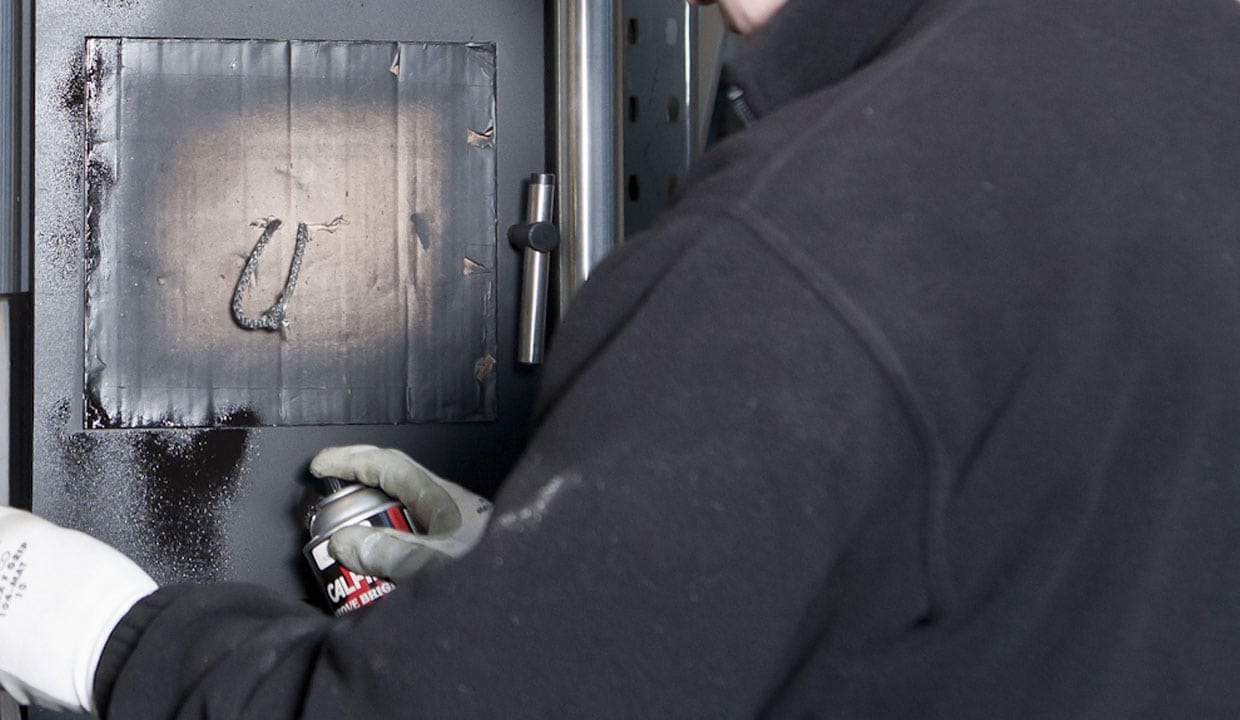
- Cover any surfaces which don’t require painting with adhesive masking tape or cardboard. Do not use masking tape on any recently repainted components that have not yet been heat hardened.
- Shake the can thoroughly for at least two minutes before use. Test spray a piece of wood or cardboard to ensure even distribution. Hold the spray can as upright as possible during spraying and maintain an even spraying distance of 20-30 cm. Check the colour match is correct for your stove.
- To touch up small scratches or flakes, hold a cardboard template 10-15 cm in front of the area to be sprayed, with an appropriately sized aperture cut into it. Spraying through the template produces a smooth transition from the repair to the unpainted area.
- First spray on a very thin layer that barely covers the area to be retouched. If the initial layers are too thick, the paint may peel off during the heat hardening process. Repeat this process, maintaining an even spraying distance of 20-30 cm, until you have reached the required depth of finish – three layers is usually sufficient. The paint should be left to dry for a minimum of two hours and ideally four hours.
- Only after complete drying should the oven be fired up to harden the paint. Make a small kindling fire to achieve a surface temperature of around 100ºC and maintain this temperature for 15 minutes.
- Add some larger pieces of wood to build up the surface temperature of the stove to normal operating temperature (400-450ºC) for around an hour. Finally, fill the firebox with dry, seasoned wood and open the flues to produce a maximum temperature of 550-600ºC for a further 60 minutes.
- The later stages of the hardening process may produce some smoke and odour, so it’s important to ensure there is sufficient ventilation.